The demand for PEX (cross-linked polyethylene) fittings is becoming more and more significant with an increase in compressed air systems, plumbing systems, and other piping systems opting towards using some form of PEX pipe for their systems network.
This has led to the need to understand all the different types of PEX fittings available to decide which is best for you, and so, I will present to you in this article all the relevant information on PEX fittings, the different types, and some examples of the fittings and required tools available online!
If you wish to learn more about PEX pipe for compressed airlines, visit our guide here!
Table of Contents
- PEX Connections & Fittings
- The Most Common Types of PEX Fittings
- Tools for PEX Connections Available Online
- General Tips for Making PEX Connections
- FAQs (Frequently Asked Questions)
PEX Connections & Fittings
There are many types of PEX fittings that can be used to make connections between different segments of PEX pipe, and each offers advantages other one another, and over other forms of plastic plumbing pipe. In comparison to other plastic plumping pipe connections that tend to use solvent glue, PEX fittings are formed mechanical unions.
The PEX connection methods will vary from manufacturer to manufacturer, but they typically fall into the four most common types. Some methods require a special tool designed to make the connection. Manufacturers of PEX pipe will typically recommend which connection is best to use with their pipe.
The Most Common Types of PEX Fittings
When it comes to making PEX connections, a lot of people narrow them down to the four most common, which are:
- Cold Expansion
- Copper Crimp
- Stainless Steel Clamp
- Push-to-Connect
It’s important to note that PEX, depending on the type of PEX, has some degree of thermal elastic memory which helps compare the connections and their function over time. Let’s take a look at the four methods in greater detail!
Cold Expansion
Cold expansion fittings with PEX-reinforcing rings fall under the ASTM F1960 standard. These fittings have the same inside diameter as the pipe, which helps to create less restriction and often allows for smaller pipe sizes. Compared to other types of connections that need some form of tool calibration, this is a completely visual connection.
If you are able to see the expansion ring touching the shoulder of the fitting, then you will know that the connection is done properly. Due to the elastic memory properties of the PEX pipe, the weakest this connection will ever be is when it is first done. As the PEX properties force it into gradually contracting, the connection is going to gradually become stronger.
The tools used for cold expansion fittings are typically one size fits all, with expansion heads being the only exception, as they need changing for each pipe diameter. The thing with these fittings is that their expansion tool typically doesn’t have autorotation built-in. This results in an extra step of rotating the tool manually between expansions.
If you don’t manually rotate the tool, it’s likely that you will experience leaks in the connection because small grooves could form on the inside wall of the pipe. Cold conditions can also prove difficult when making the connection, you must not over-expand the pipe because this will take a lot longer to contract in the cold conditions.
Tip: If you do over-expand your pipe, use a heat gun or hair dryer to help the piping contract and avoid leaks.
On the other hand, if the tool is already equipped with autorotation, the tool must be visually inspected to ensure its functionality. In most cases, it is probably necessary to conduct this inspection daily.
There are also ASTM F2080 standard cold expansion fittings which you should be aware of. The key difference between the two fittings is that the ASTM F1960 fittings should only be used where the temperature is above 5°F (-15 °C) and are only suitable for use under a maximum pressure of 100 PSI and a maximum temperature of 180 °F (82 °C).
On the contrary, ASTM F2080 fittings have no restriction on their installation temperature, operating pressure, or temperature. Therefore, ASTM F2080 fittings are the more secure form of cold expansion fitting with the only drawback being that they require two different tools to complete the connection between PEX pipes.
The ATSM F1960 standard cold-expansion fittings are typically referred to as “Propex” or “Wirsbo”. The ATSM F2080 fittings are commonly referred to as “Everloc” or “Rehau” fittings. Both these fittings are only suitable for PEX pipe that has the necessary thermal elastic memory characteristics, which are typically PEX-A and PEX-C. Unfortunately, PEX-B will not contract naturally. For an in depth comparison of Pex A vs Pex B Pipe & Fittings please visit our guide!
Here’s an example of expansion fittings readily available on Amazon!

- ✔️【 Lead Free Non-Pollution PPSU polyphenylsulfone Material 】: Easily installed without flame, flux, or solder and requires no bonding agents, glue, or solvents. Poly Alloy pex Fittings are suitable for domestic water or radiant heating system, also used retrofit construction and for hot or cold water distribution.
Prices pulled from the Amazon Product Advertising API on:
Product prices and availability are accurate as of the date/time indicated and are subject to change. Any price and availability information displayed on [relevant Amazon Site(s), as applicable] at the time of purchase will apply to the purchase of this product.
Cold Expansion Connection Method
The cold expansion connection method for the ASTM F1960 standard fitting on clean PEX pipe can be done by following these steps:
- Slide the expansion PEX ring over the PEX pipe
- Use expansion tool to expand the PEX ring and PEX tubing together
- Insert the barb fitting
The cold expansion connection method for the ASTM F2090 standard fitting on clean PEX pipe can be done by following these steps:
- First, slide the PEX-reinforcing ring over the end of the PEX pipe. It’s typical that most rings will have a stop on the end but if it doesn’t, leave a small space at the end of the ring before starting the connection
- Use the expansion tool to expand the pipe per the manufacturer’s instructions, or do so until the pipe is expanded wide enough for the fitting to fit inside it
- Finally, insert the fitting into the pipe and draw down the PEX-reinforcing ring until the shoulder of the expansion ring is in contact with the shoulder of the fitting
Tools Required for Cold Expansion Connection Method
To be able to successfully connect PEX pipe using the cold expansion method, you will need:
- Cold expansion fittings
- Expansion tool
Crimp Connection
Crimp connections when done properly are a very inexpensive and relatively quick method of connecting PEX tubing. The copper crimp rings typically fall under two standards:
The ASTM F1807 metal fittings are usually copper or brass and can be used with PEX-A, PEX-B, or PEX-C tubing. On the contrary, the ASTM F2159 plastic fittings are considered to only be used with PEX-B or similar tubing.
The compression of the crimp ring in this method crushes the pipe around the insert barb and ensures a secure fitting. The strongest this connection will be is the opposite to the cold expansion method, its optimum strength is when it is initially put together. From there on out, the PEX pipe will gradually resist the strength of the crimp ring.
It may be difficult to establish your crimp connection in tight spaces. Some of the tools needed may be larger than you wish, to help with getting better leverage on the crimp connection, but subsequently not allow you to work in tight spaces.
Here’s an example of a plastic crimp ring readily available on Amazon!
- INSTALLS IN SECONDS: No soldering or glue; Just crimp to create a watertight seal
Prices pulled from the Amazon Product Advertising API on:
Product prices and availability are accurate as of the date/time indicated and are subject to change. Any price and availability information displayed on [relevant Amazon Site(s), as applicable] at the time of purchase will apply to the purchase of this product.
Crimp Connection Method
The crimp connection method for either the ASTM F1807 or ASTM F2159 standard fitting on clean PEX pipe can be done by following these steps:
- Slide a crimp ring over the end of the PEX pipe
- Insert your desired fitting, either metal or plastic, into the end of the PEX pipe
- Slide the crimp ring into position where the fitting and PEX pipe overlap – typically the distance from the end of the pipe will vary bases on the type of PEX pipe and the manufacturer of it
- Now, use the crimp tool to compress the crimp ring until the tool stops
- Use a go/no-go gauge to verify your connection to ensure it has been made properly
Step 5 is often neglected because installers don’t have one. The problem here is that they’re so important in helping you determine whether your crimp connections are too loose or too tight. If they’re loose, this will undoubtedly result in air leaks. And, if they’re too tight, this may result in damages to the pipe or the fittings, which will also result in air leaks.
The go/no-go gauge can also aid in determining the accuracy of the crimp tool and whether it needs to be recalibrated. It’s impossible to gauge the fitting visually, yet so many people continue to neglect the go/no-go gauge. Crimp rings and their required tools are easy to purchase at a variety of retailers.
Tools Required for Crimp Connection Method
To be able to successfully connect PEX pipe using the crimp connection method, you will need:
- Crimp fitting (ring)
- Crimping tool
- Go/no-go gauge
Stainless Steel Clamp
Stainless steel clamp rings fall under the ASTM F2098 standard and when done properly, are another inexpensive and relatively fast method for making PEX tubing connections. The stainless steel clamp fitting process works just like the crimp method, but instead of using a copper, brass, or plastic crimp ring, a stainless steel clamp ring is used.
Similar to the crimp method, unfortunately not all the tools work well in tight spaces and the connection is strongest when it is first made.
The pipe naturally resists the strength of the crimp ring over time. The tools used to connect stainless steel clamps must be calibrated to ensure there are no risks. A miscalibrated tool can result in damaged fittings and air leaks, and this can be hard to detect until it’s too late.
The clamp rings can be susceptible to corrosion, and if they were to fail at any point, there will be catastrophic results. In better news, the products are easy to purchase and their tools typically are one size fits all. Therefore, a 1/2″ connection and a 1″ connection can be made with the same tool.
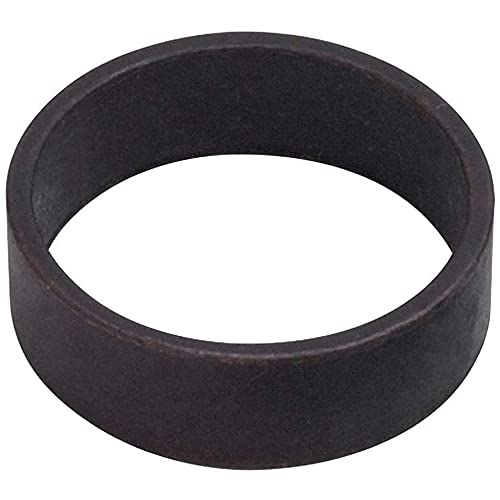
Here’s an example of a stainless steel clamp ring readily available on Amazon!

- HIGH QUALITY - Meet ASTM F2098 requirements. Made of 304 Premium Stainless steel material. Salt resistant, anti rust, anti-corrosion.
Prices pulled from the Amazon Product Advertising API on:
Product prices and availability are accurate as of the date/time indicated and are subject to change. Any price and availability information displayed on [relevant Amazon Site(s), as applicable] at the time of purchase will apply to the purchase of this product.
Stainless Steel Clamp Connection Method
The stainless steel clamp connection method for the ASTM F2098 standard fitting on clean PEX pipe can be done by following these steps:
- Calibrate the crimp tool
- Slide the stainless steel clamp ring over the PEX pipe
- Insert either a metal or plastic fitting into the PEX pipe
- Align the clamp ring with the fitting and the pipe
- Use the crimp tool and compress the clamp ring until the tool stops
Tools Required for Stainless Steel Clamp Connection Method
To be able to successfully connect PEX pipe using the stainless steel clamp connection method, you will need:
- Stainless steel clamp ring
- Stainless steel clamping tool
Push-to-Connect
Push-to-connect fittings conform to the ASSE 1067 standard or ASTM F2854 standard and are very quick to install and use in PEX systems. These fittings are typically suitable for use with most types of not only PEX tubing, including PEX-A, PEX-B, and PEX-C, but also other tubings like CPVC, copper, and more.
Often referred to as “Sharkbite” fittings, their best perk about these fittings is that they don’t need any special tool to make the connection. In addition to that, the fittings are easily removable and can be reused.
Sometimes, these fittings may require a stiffener leave, which is to keep the PEX rigid on the inside to ensure there is a good seal against the O-ring inside the fitting. The tricky part here is you can’t see whether or not the stiffener was installed and if the pipe was pushed enough into the fitting to create a suitable seal. If you unintentionally miss the sleeve or don’t push it hard enough, you’re very likely to get leaks.
Push-to-connect fittings are by many often seen as a temporary fix, to keep the tubing in place before properly connecting them. Most people have these fittings on hand in the case of emergencies.
It should also be noted that some jurisdictions do not allow push fittings to be used in some applications due to documented events of failure under temperature fluctuations.
Here’s an example of a Sharkbite push-to-connect fitting readily available on Amazon!

- INSTALLS IN SECONDS: No special tools, soldering, crimping, or glue; Just push the adapter to create a watertight union
Prices pulled from the Amazon Product Advertising API on:
Product prices and availability are accurate as of the date/time indicated and are subject to change. Any price and availability information displayed on [relevant Amazon Site(s), as applicable] at the time of purchase will apply to the purchase of this product.
Push-to-Connect Connection Method
The push-to-connect connection method for the ASTM F2854 standard fitting on clean PEX pipe can be done by following these steps:
- Push the PEX pipe into the push-to-connect fitting per manufacturer’s instructions
Job done, it’s as simple as that! If necessary, follow any additional instructions provided by the manufacturer. You may need to insert a stiffening sleeve into the PEX pipe first depending on your type of fitting.
In addition to the four most common, there are different types of PEX fittings that are important to know about. I’ve already mentioned the sleeve variation of push-to-connect fittings, and another different type is the press-fitting!
These types of fittings are very similar to crimp fittings, with the key difference being that they do not need an outer crimp ring. Instead, once a PEX pipe is placed over the press-fitting sleeve, a press tool is used to squeeze the rubbing until it locks to the inserted sleeve. Sometimes it’s possible to obtain press fittings with the press sleeve pre-installed for ease of installation.
Press fittings tend to be proprietary, and so, they must be used with the manufacturer’s own press tool. These types of fittings are suitable for PEX-A, PEX-B, and PEX-C.
Tools for PEX Connections Available Online
Some connection methods will require additional tools, as mentioned in the descriptions of each various PEX fitting’s connection methods, and you can typically obtain these tools at your local retailer. Some fittings will only work with the tool made by the same manufacturer as the fitting, and so, maybe you will buy the fittings and the tool together.
I will now provide you with examples of these tools that are readily available on Amazon. By no means, am I saying these are the right ones for your job – that typically depends on whether they will work with your fittings. I will pick out the tools I believe are the best available on Amazon, and boast the best reviews from PEX users alike!
Expansion Tool
This expansion tool available on Amazon is suitable for expanding PEX A pipe and meets ASTM F1960 standards. A lot of users swear by this product and describe how great it is, with the only issue being that due to its size, it is not suitable for tight spaces.

- Purpose: IWS-1960 expander tool is designed for expanding type A PEX pipe for insertion of ASTM F1960 expansion-style fittings.
Prices pulled from the Amazon Product Advertising API on:
Product prices and availability are accurate as of the date/time indicated and are subject to change. Any price and availability information displayed on [relevant Amazon Site(s), as applicable] at the time of purchase will apply to the purchase of this product.
Crimping Tool
This lightweight crimping tool meets ASTM F1807 standards and had angled heads to allow you to get into tight spaces with ease. It boasts terrific reviews and comes with a go/no-go gauge so that you can ensure your connections are secure.

- Use with 1/2 and 3/4 PEX Copper rings, PEX Tubing and PEX Barb Fittings
Prices pulled from the Amazon Product Advertising API on:
Product prices and availability are accurate as of the date/time indicated and are subject to change. Any price and availability information displayed on [relevant Amazon Site(s), as applicable] at the time of purchase will apply to the purchase of this product.
Stainless Steel Clamping Tool
The stainless steel clamping tool below is an Amazon choice tool with almost four thousand reviews, with the majority being excellent. This tool meets ASTM 2098 standards and is not just for clamping, but can also be used to cut PEX pipe. The only downfall is that a few users mentioned that it is tricky to use in tight spots.
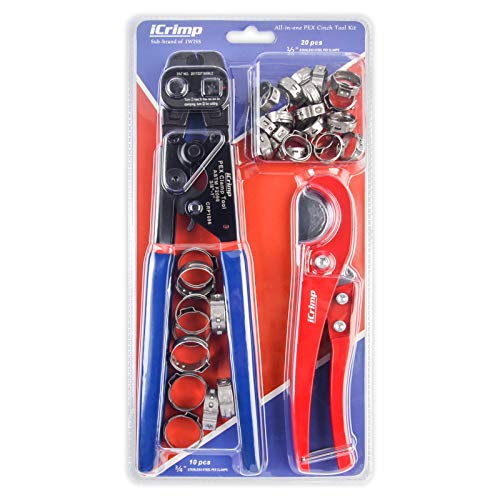
- 「UNIVERSAL」This tool meets ASTM 2098 standard will work with stainless steel clamps from any manufacturer to make PEX connections from 3/8-inch to 1-inch. It can also be used to cinch single ear hose clamp,as long as the ear’s length&width is within the opening range of the jaws.
Prices pulled from the Amazon Product Advertising API on:
Product prices and availability are accurate as of the date/time indicated and are subject to change. Any price and availability information displayed on [relevant Amazon Site(s), as applicable] at the time of purchase will apply to the purchase of this product.
PEX Press Tool
This PEX press tool by Viega PEX is rated highly by users, describing how perfect it was for their jobs. The tool boasts proven quality and excellent corrosion resistance.

Prices pulled from the Amazon Product Advertising API on:
Product prices and availability are accurate as of the date/time indicated and are subject to change. Any price and availability information displayed on [relevant Amazon Site(s), as applicable] at the time of purchase will apply to the purchase of this product.
General Tips for Making PEX Connections
The fewer fittings you have, the better. Where possible, reduce the number of fittings your system has to help minimize the potential for leaking or disruptions in your flow.
In general, the following can be used as tips to keep in mind for when you’re making PEX connections:
- Bend tubing to change directions rather than making right-angle bends with fittings where possible
- Bundle pipe runs together to reduce installation time where possible
- Choose the right diameter of PEX pipe for your desired application
- Ensure that connection points are accessible to simplify future maintenance
- Group plumbing fixtures together where possible
- Minimize tubing lengths when planning/mapping out the system layout
- Plan any needed transtition points to optimize efficiency
- Utilize manifolds to feed multiple PEX lines from a single supply pipe
- Utilize PEX color coding if necessary
FAQs (Frequently Asked Questions)
There are many variations of PEX fittings available on today’s market. These include metal or plastic insert fittings that use either a crimp ring or a stainless steel clamp. Another few common fittings are cold-expansion fittings, push fittings, press fittings, and compression PEX-AL-PEX fittings.
The best PEX fitting typically depends on which one suits your project the best. Every PEX fitting has its advantages and disadvantages, and so, you must compare them against one another to find the best for you. Typically, people tend to opt for one of the following four most common PEX connections: copper crimp, stainless steel clamp, push-to-connect, cold expansion with PEX-reinforcing rings.
No, they do not. PEX A is more flexible than PEX B and so it is able to be fastened using cold expansion. PEX B is not expandable like PEX A and so you cannot use this method of connection. PEX B uses an insert-style fitting, where you insert the fitting into the pope and fasten it with a copper sleeve and crimp tool.
No, PEX crimp fittings are installed by using a copper crimp ring that goes on the outside of the pipe, typically PEX-B or PEX-C. On the other hand, expansion fittings are installed by expanding the pipe, typically PEX-A, and collar which is installed at the end of the pope by using a power expansion tool.
Yes, PEX compression fittings operate very similarly to those used on copper or other plastic piping. Compression fittings are very easy to install on PEX pipe, and so, they are a very popular choice amongst a lot of people!
Installing a compression fitting on PEX tubing will typically involve placing the compression insert at the end of the PEX tubing, sliding the compression ring over the tubing, and then securing it with a compression nut. As the compression nut tightens, it will press the ring and the tubing against the insert which forms an absolute seal.
Both offer great benefits but compression fittings will undoubtedly offer a tighter hold. SharkBite push-to-connect fittings are relatively new and offer an easy installation while compression fittings are applied for minimal movement. Both are popular choices, and as long as you secure the pipe from movement by applying the fitting correctly, they will both offer you long-term solutions for permanent connections.
PEX fittings, depending on their type and the manufacturer, are estimated to be able to hold maximum working pressures of around the 200 PSI mark. Some may be designed to hold a lot more with they’re larger in size.
Additional Reading:
- Using Aluminum Air Pipe For Compressed Air
- Copper Pipe For Compressed Air
- Galvanized vs Black Pipe For Air, Gas And Water
- Using ABS Pipe For Compressed Air
- Using Nylon Tubing For Compressed Air
- PVC Air Lines
- Using Pex Pipe for Compressed Air Lines – Do’s & Don’ts
- Best Compressed Air Pipeline Materials For Compressed Air Piping Systems
- Steel vs Brass Air Fittings
- Industrial vs Automotive Air Fittings
- Compressed Air Metric Fittings
- Air Hose Fittings Types – Guide To Air Compressor Coupler Types
- Compressed Air Fittings Guide
- Air Compressor Hose & Tube Guide
- Using Pex-Al-Pex Compressed Air & Pex-Al-Pex Fittings
- Pex A vs Pex B Pipe & Fittings
- How to Plumb an Air Compressor Setup in Garage
If you have any questions regarding PEX fitting types, please leave a comment below, with a photo if applicable, so that someone can help you!