Do you need to test your air compressor capacitors? This page will provide you with a step-by-step guide on how to go about doing so!
I am, along with many others, grateful for the following information about testing capacitors, from an anonymous visitor, who took it upon him/herself to provide this information for me to share with you.
Table of Contents
- Testing Capacitors
- Equipment Needed For Testing Capacitors
- Start Capacitor Testing Step by Step Guide
- Run Capacitor Testing Step by Step Guide
- Blowing Breakers
- FAQs (Frequently Asked Questions)
Testing Capacitors
There are various ways to test capacitors, but for your average handy person, there’s an easy way to tell whether they are good or bad.
Generally, capacitors themselves fail in one of two ways: they become an open circuit or a dead short. When they’re a dead short, usually they trip a breaker or explode, so most likely it’s not dead shorted.
I’ll tell you how to test it after letting you know about the other “capacitor failures” that are just as common as the capacitor itself.
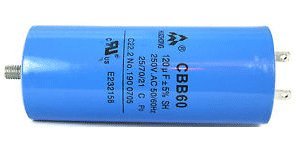
The start capacitor for one model of a Bostitch air compressor is shown below.
Capacitor Connection Failure
That’s a connection failure. Look closely at the terminals where the capacitor connects. Are they rusty? Are the push-on connectors loose? Are they discolored, like they were overheating? Is there melted plastic around the area?
All those things could mean a bad connection… I even had one where the terminals and wire connectors were fine, but the rivets that held the terminal (push-on tab) on the capacitor were rusty enough that there was no connection. The electrical test to the rivet showed a good capacitor, but not to the connector.
Equipment Needed For Testing Capacitors
To check the capacitor you need a volt meter/ohm meter. Do not touch the terminals of the capacitor with your fingers or metal objects before you’re sure there is no charge on the capacitor!
It could have up to 1.4 times the voltage that the motor takes (the actual peak voltage reached by a 120 AC volts line is actually over 170! 120v is just the equivalent DC voltage, or the root mean square of the sine wave… but that’s another story).
It’s also useful to have a screwdriver handy so that you can double-check the voltage during the test. Other than that – you’re good to go!
Start Capacitor Testing Step by Step Guide
Step-by-step guide for testing a start capacitor:
- Check Voltage
Check the Voltage on the capacitor with your volt meter set to DC Volts. Make sure to check all the terminals on your capacitors, and push your probes hard enough to dig in through the crud or surface oxidation. If it reads close to zero – move on to step 2!
- Double Check Voltage
Use a screwdriver and push it hard enough to make a good solid contact with both terminals, but no other metal (and make sure you are not touching the screwdriver or anything that could lead to a shock).
If you were wrong about the reading or didn’t have the voltmeter turned on, there will be a really strong “zap!” – a spark that might melt a chunk out of your screwdriver. - Unplug Wires
Now that you’re sure there’s no charge on the capacitor, if you haven’t already unplugged the wires to it, take note of where they were and unplug them.
- Switch Your Volt Meter to Ohms
Switch your volt meter to the ohms range, maybe around the hundred ohms range if it isn’t auto-ranging. Check the meter by touching your two leads together – the meter should go immediately to about zero ohms if everything is set right, and you have a good battery in it.
- Switch the Probes
Switch your probes to the opposite terminals on the capacitor. Now the capacitor is charged the opposite way from what you’re measuring, so the ohm meter will momentarily read a negative number and move through the range to zero and back to the high number or infinity like it did before.
Note: if your meter is not digital, it’ll slam the needle to the peg as it discharges the capacitor and recharges it the other way. - Repeat Probe Switching
I recommend switching the probes back and forth a couple of times to make sure you’re getting that capacitance effect that sends the number negative and slowly rises back up. Only a capacitor does that and it won’t do it if the capacitor is shorted or an open circuit.
That will give you about a 95% certainty that the capacitor is good… again, the value of a capacitor rarely changes significantly enough to affect the running of a motor.
Also, most motors have a start capacitor, which is only used to START the motor. The capacitor and the start windings are only used to get the motor up to speed. A few motors (usually the bigger ones) also have a run capacitor.
If the capacitor is just weak, and not blown entirely, diagnosing that is difficult. Another anonymous contributor offered the following useful advice.
“It’s rather difficult to test a capacitor without a multimeter that has a feature that allows you to test for capacitance directly.
To see if your capacitor is within specification set the meter to the capacitance mode and apply the test leads to the terminals – it will take a few seconds as the meter is actually charging the capacitor and then reading it in farads. Be careful when testing capacitors because they do hold a charge which sometimes can be hazardous.
A continuity tester will tell you if it’s blown open or shorted so if the only meter reads Infinity or almost zero owns the capacitor is toast. If it is simply weak an old meter will be very very difficult to interpret correctly. Hope this helps.”
Please visit our Air Compressor Capacitor Guide for more information on capacitors and replacements readily available on Amazon!
Run Capacitor Testing Step by Step Guide
Step-by-step guide for testing a run capacitor:
- Check the Voltage
First of all check the Voltage on the capacitor using your volt meter, having it set on DC Volts. Be sure to check all the terminals on your capacitors whilst pushing the probes hard enough to dig in through the surface oxidation. If your volt meter reads, close to zero – move on to step 2!
- Double Check the Voltage
Use a screwdriver and push it hard enough against the terminals to make a good, but no other metal.
Note: make sure you are not touching the screwdriver or anything that could lead to a shock!
If you were wrong about the reading or didn’t have the voltmeter turned on, there will be a really strong “zap!” – a spark that might melt a chunk out of your screwdriver. - Unplug the Wires
Now that you’re absolutely certain that there is no charge on the capacitor if you haven’t already unplugged the wires, take note of where they are and unplug them.
- Switch Your Volt Meter to Ohms
Switch your volt meter to the hundreds ohms range if it is not auto-ranging. Check the meter by touching your two leads together – the meter will immediately go to about zero ohms if everything is set right, and you have a good battery in it.
- Switch the Probes
Switch your probes to the opposite terminals on the capacitor. The ohm meter will momentarily read a negative number and move through the range to zero and back to the high number or infinity as it did before. This is because the capacitor is charged the opposite way from what you’re measuring.
Note: if you have a digital meter, as it discharges the capacitor it’ll slam the needle to the peg and recharge it the other way. - Repeat Probe Switching
It is recommended to switch the probes back and forth a couple of times to ensure you’re getting that capacitance effect that sends the number negative and slowly rises back up.
Note: Only a capacitor does that and it won’t do it if the capacitor is shorted or an open circuit.
Blowing Breakers
And one thing I would check if you’re blowing breakers is whether you have too long or too light of an extension cord. You may be losing a lot of power across the cord, so your motor draws more amps to keep running, and that could be blowing your breakers.
To see if that’s an issue, try to check your voltage at the compressor while it is running, especially when it is bogging down. If it is significantly below 110 or 220 volts, then you might get better power to your motor and see if it still does that.
FAQs (Frequently Asked Questions)
Set the multimeter to read in the high ohms range. Touch the meter leads to the corresponding leads on the start capacitor, red to positive and black to negative.
Here the meter should start at zero and then move slowly towards infinity. If it does then the capacitor is in working condition, if it doesn’t and stays at zero, the capacitor is broken.
If a start capacitor goes bad and fails, the motor can display a variety of issues including not starting, overheating, and vibrating. This is because a bad start capacitor is depriving the air compressor’s motor of the full voltage it needs to operate effectively.
First of all, get a multimeter at hand and set it to read in the ohms range. Now touch the multimeter leads to the corresponding leads on the run capacitor (black to negative and red to positive).
The multimeter if working correctly will start at zero and move slowly towards infinity. However, if the multimeter stays at zero then the capacitor is broken.
If you have any questions regarding how to test capacitors on air compressor motors then please leave a comment below with a photo if applicable so that someone can help you!